

Bench Press Mastery: Strategies for Strength and Stability
The bench press is a measure of your raw strength and stability. Proper bench press form is a fine line. Get it wrong, and you're looking at decreased performance and potentially injury.
But, if you get it right, you can unlock a whole new level of functional fitness that translates into the outdoors, frontlines, or wherever your professional and personal pursuits take you.
That's why solid technique is non-negotiable. This isn't just gym talk; it's straight from the MTNTOUGH Form Lab, where Coach Major Donny Bigham breaks down the science and form behind every lift and movement.
In this guide, we'll tap into Coach Bigham's expertise on bench press, dissecting its anatomy, and what it takes to master it - safely and effectively.
The Anatomy of a Perfect Bench Press
The bench press isn't just about pushing weight. If that’s your impression, then it’s time to rewire your understanding of this exercise. Understanding the biomechanics of the move is the best place to start.
What Is the Proper Form for a Bench Press?
First and foremost, it’s not a simple push. Done correctly, the bench press is a complex movement that engages multiple muscle groups. We're talking about force vectors, muscle engagement, and the science that makes your bench press either a powerhouse or a recipe for disaster.
- Force Vectors: These are the directions in which your muscles exert force during the lift. Get this wrong, and you're wasting energy and risking injury. Get it right, and you're optimizing every ounce of your strength.
- Muscle Engagement: This isn't a one-muscle show. Your chest, shoulders, and triceps are the stars, but your lats and even your legs play supporting roles. Knowing how to engage each muscle group is key to a successful lift.
- Science of the Press: Understanding biomechanics isn't just for the ‘nerds’; it's for anyone who wants to lift smarter. Knowing the ‘how’ behind the movement helps you fine-tune your form, making your time on the bench more efficient and effective.
In practice, nailing your bench press form and checking all the boxes above is a matter of stability, bar path, and how you tap into your muscles. Let’s dig into the important details of each.

The Pillars of Bench Press Stability
Stability. It's the foundation of a powerful bench press. If you're wobbly on the bench, you’ll never maximize performance, and almost certainly open the door for hurting yourself.
Cutting through the noise, two keys to a stable bench press: maintaining points of contact and using your legs.
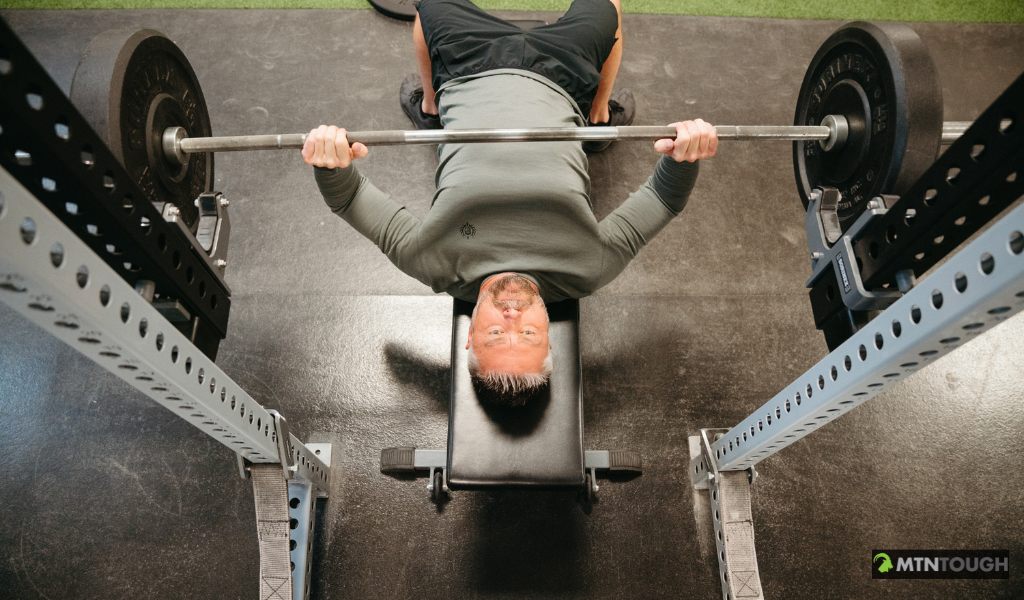
Five Points of Contact
Your body makes five crucial points of contact with the bench and your environment: head, shoulders, butt, and both feet.
But it’s best to reframe ‘points’ as ‘anchors’ because that’s really how your body should make contact with the bench and ground in a bench press; like you’re weighed down in all 5 places. Anchor in, and you're well on your way to a stable press.
Role of Leg Drive
Think your legs are just along for the ride? Think again. Your legs generate a force that travels up your body and into the lift. It's not about stomping your feet though. You’re trying to channel that raw power from your legs into your upper body.
Plant your feet firmly on the ground and engage your glutes and quads. This leg drive generates force that travels up your body, aiding in the lift.
It’s a simple change that can turn your bench press into a full-body workhorse.
Understanding and Correcting Bar Path
You've got your stability down; now let's talk trajectory. The path your bar takes during the lift isn't a minor detail - it's the blueprint of your bench press success.
Contrary to popular belief, the bar path in a bench press is not a straight line. It should follow a slight curve, often described as a 'Lazy J'.
Guide to 'Lazy J'
Despite its name, the 'Lazy J' isn't some gym folklore. The ‘Lazy J’ is the optimal bar path for a bench press.
Imagine the bar tracing a subtle 'J' shape as you press. Starting from the lower sternum and moving towards the eyes as you press upwards. Why? It's about physics. Following the 'Lazy J' keeps the bar over your strongest points, maximizing the force you can apply.
How to Correct Your Bench Press Bar Path
Mistakes in the bar path are real setbacks sure to delay your gains.
Pressing in a straight line or letting the bar drift are the common culprits. Here's the fix: drills that correct your path and turn those mistakes into muscle memory for a perfect lift.
Engaging the Right Muscles
If you’re hellbent on functional fitness then your muscles aren’t just for show. But like any weapon, they’re entirely useless if you don’t know how to use them right. Unfortunately, most casual gym-goers aren’t accessing their entire arsenal of muscles. So, let’s get tactical and make sure you’re getting the most out of your press.
Importance of Lats and Upper Back
Your chest and arms might be the stars of the bench press show, but your lats and upper back are the unsung heroes.
While your chest, shoulders, and triceps are the primary movers, your lats and upper back are equally important for stability and control.
When you’re grinding through those last few reps in a set, if you can tap into your lats and upper back, you’ll be able to add that extra push you need without compromising the move.

3 Common Bench Press Mistakes and How to Avoid Them
Bench pressing is no joke. It's raw power, but with that power comes the potential for mistakes. Let's break down three big ones and set them right.
1. Rushing the Setup
You wouldn't sprint off a cliff without checking your parachute first, right? The same goes for bench pressing. A rushed setup is asking for trouble.
- The Problem: Misalignment, uneven lifts, weakened performance, and injury.
- The Fix: Slow down. Plant your feet, grip the bar right, and lock in. Every rep deserves respect.
Real Tips to Nail the Setup:
- Positioning: Start by lying on the bench with your eyes directly under the bar. This ensures you're not too far forward or backward.
- Foot Placement: Your feet should be flat on the ground, spread apart for stability. Sometimes a simple adjustment to the bench is all you need - lower or raise it as needed to make sure you have firm contact with the ground.
2. Incorrect Grip
Your hands are your lifeline to that bar. Mess up the grip, and you're compromising the whole lift.
- The Problem: Too wide or too narrow, and you're straining more than just your muscles. And whatever you do, avoid the suicide grip… more on that shortly.
- The Fix: Find your sweet spot. It's different for everyone, but when you find it, you'll know. And always, always keep those thumbs wrapped.
Grips to Consider:
- Standard Grip: Hands shoulder-width apart. This is the most common grip and offers a balance between chest and tricep engagement. You can’t go wrong with a standard grip.
- Close Grip: Hands closer than shoulder-width. This grip targets the triceps more.
- Wide Grip: Hands set wider than shoulder-width. This grip emphasizes the chest but can strain the shoulders if overdone. Just know that the wider grips require greater thrust.
Avoid the 'Suicide Grip'
Don't let the name scare you away, well maybe do...but at least understand what it is before you run from it. The suicide grip (also known as false grip) is a thumbless grip, where you position your thumbs next to your index fingers instead of wrapping them around the barbell.
It puts the bar higher in your palms, which forces you to pull your wrists back. This series of events means you need to find a solid neutral position for your wrists and a perfect angle for pressing. If you’re wondering why anyone would do this, you’re asking the right questions.
Those in favor of it will tell you that it does wonders for your triceps and that it’s good for developing wrist strength.
We’re on the other side of this argument. The suicide grip is begging for injury. Aside from your wrists, this grip gives you less control of the barbell and causes it to slide. This can lead to the enter bar falling into your face, neck, chest, etc. In short, it's a grip style that's high-risk, low-reward. Stick to grips that give you control and safety.

3. Lack of Anchor
Floating around on the bench? That's power you're wasting.
- The Problem: Without a solid anchor, you're not just unstable; you're inefficient.
- The Fix: Plant those feet. Glue your backside to the bench. Engage your core. Think of it as locking yourself in for the ride.
Tips to Establish a Solid Anchor:
- Tighten Your Core: Before you even lift the bar, tighten your core. Think of it as bracing for a punch. This engages your entire body.
- Squeeze the Glutes: Your glutes play a significant role in stability. Squeeze them to ensure you're not just resting on the bench but actively using it.
- Pull Shoulder Blades Together: This creates a stable base for you to press from and reduces the risk of shoulder injuries.
Practical Tips to Improve Your Bench Press Weaknesses
You've got the basics down and; now it's time to fine-tune your bench press. We're talking about drills and exercises that will make you not just strong, but MTNTOUGH. There are countless ways to refine your bench press form, but the following three are game-changers for the most common mistakes made.
1. Stability: Band for Glute Engagement
Glutes aren't just for squats. They’re also a secret weapon for anchoring and using your legs to help drive the movement of a bench press. Coach Bigham always emphasizes the importance of stability through your entire body; from the ground all the way to the bar.
Using an external band for glute engagement can transform your bench press from a good lift to a great one. Just like in the video, grab a 12 inch band and place it around your knees and push out. You’ll bring your glutes into the lift and stabilize the entire movement.
Leg Drive and Stability Drill
- Lie down on the bench with your feet flat on the ground.
- Ensure your back is flat against the bench.
- Position a 12-inch band around both knees.
- As you set up, aim to have your tibia or shin vertical on each side.
- Grip the barbell with your thumbs around the bar for safety.
- Before lifting the bar, push your knees out to activate the glutes.
- Perform the bench press reps while maintaining stability and driving through the legs.
2. Bar Path: Banded Pull-Apart
They aren’t talked about as much as your chest or arms, but your upper back and shoulders play a critical role in hitting the ‘Lazy J’ bar path and stabilizing the motion.
If bar path is your bench press challenge, grab a band. You can use its tensile strength as resistance to increase the strength and resilience in your upper back. It translates into activating those same muscles in a bench press so you can take control over the bar path.
Lat Engagement for Bar Path Control
- Stand upright with feet shoulder-width apart.
- Hold a resistance band with both hands in front of you, arms extended.
- Ensure the band is taut but not overly stretched.
- Pull the band apart by moving your hands away from each other.
- Focus on squeezing the shoulder blades together.
- Slowly return to the starting position.
- Repeat for the desired number of reps.
3. The Setup: Banded Unrack
This drill is all about taking control from the start to the end. It begins by activating your lats while you unrack the weight, continues as you manage the bar path, and doesn’t stop until you rack the weight.
Telling your lats to focus, get aggressive, and stay involved from the beginning will make your press more precise and, ultimately, more powerful.
To get your lats going, you’ll use a band to create resistance as your pulling the bar out of the rack.
- Set up a resistance band around the barbell and the squat rack, ensuring it's tight against the rack.
- Lie down on the bench press.
- Grip the barbell as you would for a regular bench press.
- Engage your lats by imagining you're trying to bend the barbell.
- Slowly unrack the barbell, pulling against the resistance of the band.
- Focus on controlling the bar and maintaining lat engagement.
- Once the bar is in the starting position, you can proceed with your bench press reps.
- Rack the barbell back after completing the reps.

The Road to Bench Press Mastery
Mastering the bench press requires a serious dedication to strength, discipline, and technique. Every detail has to matter. From your grip to the placement of your feet.
But remember, knowledge without application is just trivia. It’s great for quiz night at the bar, but it won’t help you in the line of duty or in the middle of woods.
So if you really want to get the most out of your effort in the gym, then it’s time to put these insights to work.
Building a solid form on the bench press boils down to mastering your body, the biomechanics behind it, and applying your know-how with precision. It won’t be easy, but that’s usually a good sign that you’re on the right track.
At MTNTOUGH, we believe in pushing boundaries, both in the gym and out in the field. Operating in a zone of discomfort is key to growth.
For those who are serious about taking their bench press and functional fitness to the next level, the MTNTOUGH Form Lab is your next stop. With Coach Major Donny Bigham's expertise, you'll not only lift weights correctly, but experience a surge in performance.
Sound interesting? If so, get your 14-day free trial and check out the entire library of Form Lab training. This two week trial will also give you access to every MTNTOUGH program and workout, so you’ll have more than enough time to see how MTNTOUGH can help you dig deeper, train smarter, and become the best version of yourself.


